Showing posts with label literacy activities. Show all posts

Friday, 24 May 2013

Alphabet Activities for Playtime (A-D)

This term at Playtime, we are learning about the alphabet. The kids and the parents have been really positive about the activities and songs. I have noticed Mr Fun singing the songs and pointing out the letters while we are out and about. 

We have been using the songs and actions from the Jolly Phonics program (http://jollylearning.co.uk/). I have made a poster for each letter (with just one letter and a picture cue on each poster). I really like the Jolly Phonics program because it appeals to different types of learners - visual (the posters), auditory (the songs) and kinaesthetic (the actions for each sound). You can find the songs on YouTube, and buy the book (Jolly Songs) online.

Each week at Playtime, we focus on one letter; we do a craft, a story and teach the relevant song from Jolly Songs.

Aa

Craft: Salt-dough ants
I pre-made the ants and baked them in the oven. I used a skewer to poke holes for legs and antennae prior to baking. At Playtime, the kids inserted pipe-cleaners into the holes and glued on googlie eyes with PVA glue. I had planned to get the kids to paint them too, but they were happy with them unpainted, so I decided to save myself some cleaning-up. ;)


Song: Ants on my arm 

Story: We read a Sam the Ant book from the Reading eggs series.

Bb

Craft: Butterflies
We gave the kids a butterfly outline. We placed blobs of paint on the paper, then folded it in half. The kids spread the paint around to create beautiful butterfly pictures. 


Song: Bring your bat and bring your ball

Story: The Very Hungry Caterpillar by Eric Carle (the caterpillar turns into a butterfly). 

Cc

Craft: Castanets
One of the other lovely Mums planned this craft (thanks Cara!) We made castanets from cardboard, stickers and buttons. The kids decorated strips of thick cardboard with crayons and stickers. They then glued buttons inside with PVA glue to make the clicking castanet sound. This craft has been really popular with Mr Fun - he loves clicking his castanets and singing the song.


Song: We are clicking castanets

Story: Cookie Cat

Dd

Craft: Drums
This was a really popular craft! Even the kids who don't normally participate in craft time wanted to do this one! I spray-painted empty baby formula tins with gold spray paint. The kids stuck foam pictures to the drums with PVA glue. We then used cheap chopsticks as drumsticks. During story-time, we said a rhyme that involved drumming, so the kids got to test out their new drums.


Song: See me play on my drum

Story: Maisy's Band


Thursday, 15 March 2012

Getting kids excited about sight words

Learning sight words is an important part of learning to read in the early years of school, but for some kids it's hard work (for both the kids and their parents). Here are some ideas for teaching sight words (and making it fun).

Make it achievable
Teach a small number of sight words at a time. If your child is sent home a list of 5 words or 10 words, take your time learning them over the week. To start with, introduce only 2 words. Once those 2 words are mastered, add 2 more. Kids can feel overwhelmed by a whole list of words that they don't know. It's great to build their confidence by having them master a small set at a time.

Make it fun
Kids are often tired after a day at school (particularly at the beginning of kindergarten/prep). To help gain kids' interest in learning after school, it is worth putting some effort into fun activities for teaching sight words.

Hopscotch
Draw up hopscotch squares in chalk and write one word in each box. Play hopscotch, reading the words as you jump on each square.


Bingo
This is a very "school" activity (they may play it in their classroom), but lots of kids love it. It's a good way to review words when they already know quite a few (a standard bingo board will have 25 words). There are websites that let you enter your own words into a template and they will create bingo boards.

Dig for rocks
Write the words on stones and bury them in the sandpit or a bucket of sand. Dig in the sand to find the stones. Read each word as you find them.


Car race
Get a group of matchbox cars. Write one word on each matchbox car (use a thin permanent marker to write directly on the car, or write onto a label/sticky tape, or use a label maker). Push two of the cars and see which car "wins". Read out the winning words - eg "go" is first, "can" is second (this is also good practise of ordinal numbers!). If your child is not interested in matchbox cars, you could do the same activity with marbles, tennis balls, ping-pong balls, etc.

I wrote the words on sticky tape & had no problems removing the words at the end
Word match
Write a group of words in large print and put them around the room or backyard. Give your child a small card with one word written on it. When you say "go", they run around the room finding the word that matches the card. Ask them to read the word to you. Continue giving them the small cards until they have found all the words. Once they are more confident with the words, you can increase difficulty by not giving them the small cards - just call the words out and let them find them around the room/backyard.

The "cards" don't need to be flashy. I just hand-wrote these words on a piece of paper.
Go Fishing
Write the words on paper fish and attach a paper clip to each fish. Make a simple fishing rod from a chopstick, a piece of string and a magnet. Pick up the fish words and read each word aloud. You could make this a 2 person game by making 2 rods and seeing who can collect the most fish in a given time period. Once all the fish have been collected, each player reads aloud the words that they caught.

I used a magnetic clip as the magnet

How are you going with teaching your kids sight words? Do you have other sight-word activities that your kids enjoy?

Thursday, 17 November 2011

The things you can learn from building a lego house!!

Mr Sociable loves to be a "builder". The other day, he walked downstairs wearing his builder hat & carrying a toolbox. He suggested we should draw some plans for building. I got out our new whiteboard crayons (which, incidentally, are really good!) and we decided to draw plans for a house.

He loves this builder's hat! It's a "real" one that belonged to Franky's Dad.
Logical Thinking & Discussion
Mr Sociable drew the house in the order that we would build it. So we talked about each stage of building as he did the drawing. He suggested we should put the windows in first - so we talked about the importance of foundations. We talked about how the parts would fit together and I listened to his creative stories about how people could get to the door in the middle of the wall (I eventually convinced him that stairs might be a good option).

The finished plans
Labeling/Diagrams & Phonics
As Mr Sociable drew each part of the house, I wrote a label. This was a great opportunity to show him how labels work in diagrams. We were also able to talk about the words and sounds (eg. 'window' starts with a 'w'). To extend this activity, you could talk about the other sounds in the word, or ask kids to "find the label that says..."

Super-happy with his house! He still has this
in his room - he can't bear to pull it apart!
Following Instructions
We built the house (mostly) according to the plan. I encouraged Mr Sociable to check the plan to see what we were missing. I reminded him about the order that we developed when we drew the plans and we followed that order to build the house.

Thursday, 15 September 2011

Quick tip - kids' activity books

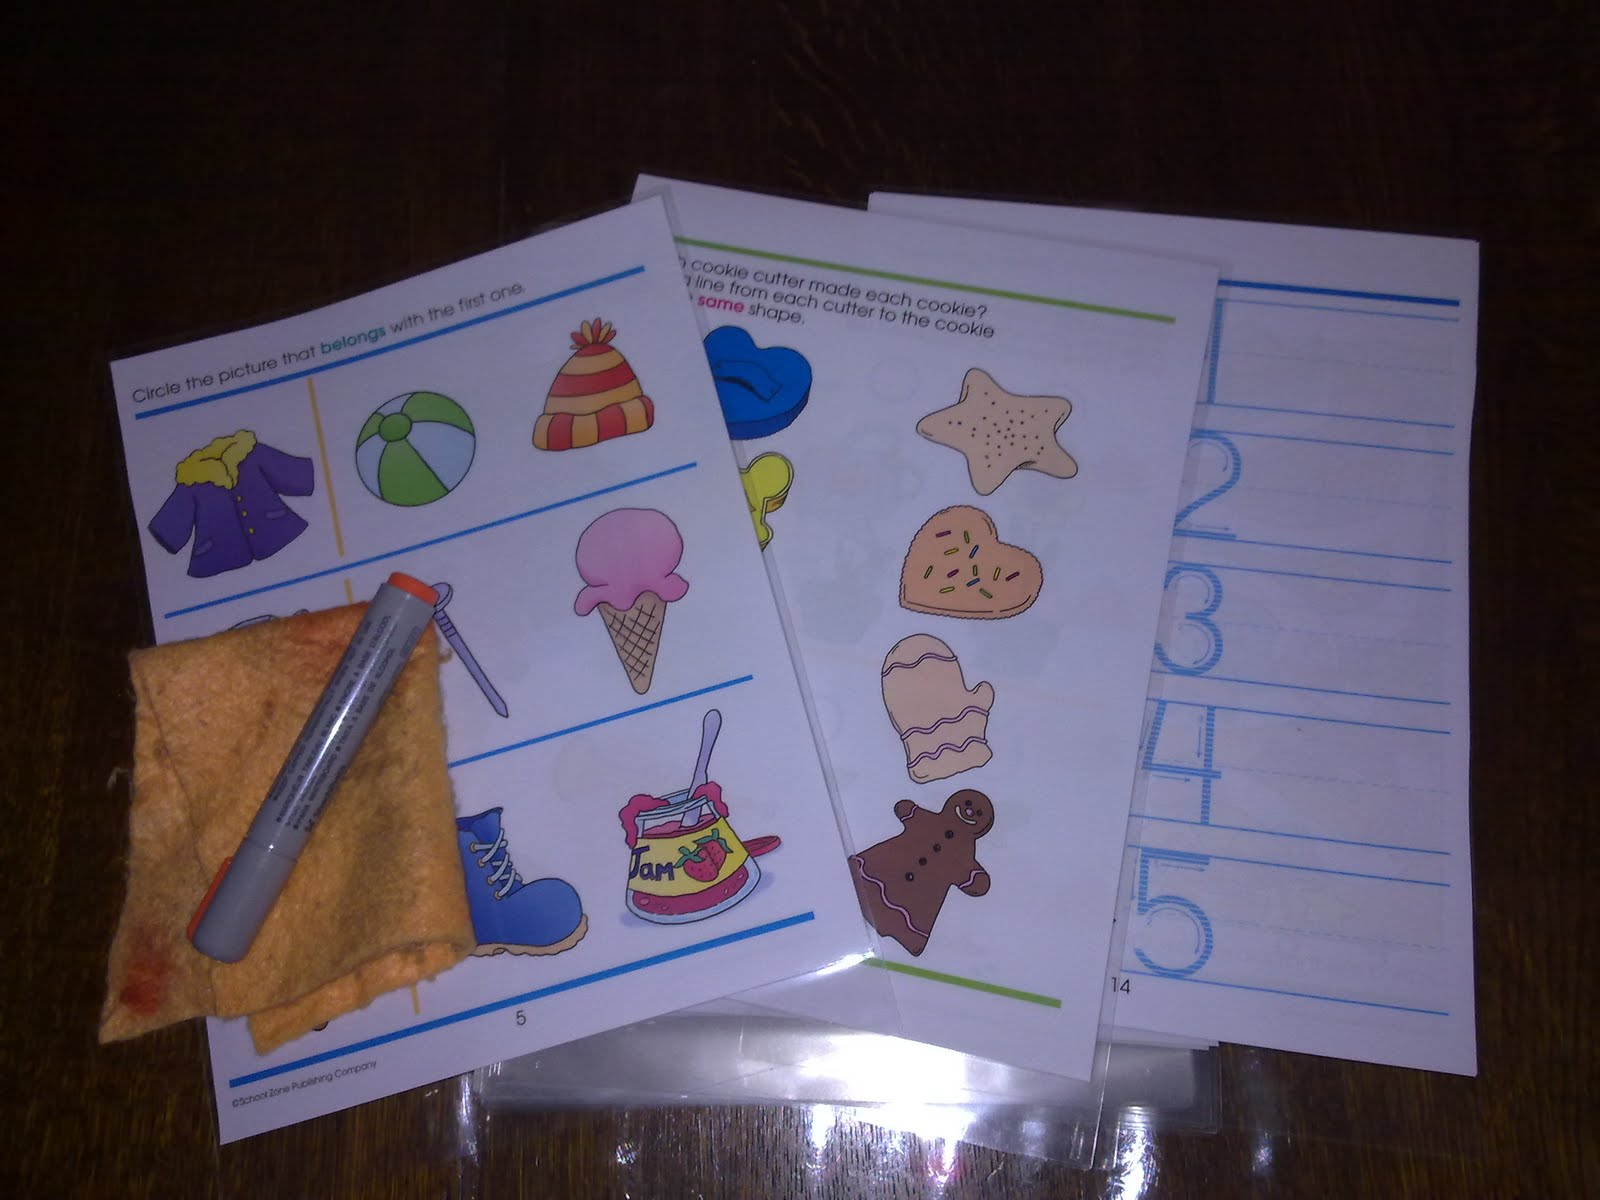
A few months ago, I bought a "preschool learning" activity book for Mr Sociable (because I wanted to use my A&R voucher before they closed down!). It's been sitting in my cupboard for months, not being used. There was something too wasteful about using that $12.95 coloured activity book - each page would only be written on once, then put in the recycling. I couldn't do it!

But, then I had an idea... I used a craft knife to cut the pages out & laminated them. Not every page, but lots of them. We now have laminated letter-tracing, number tracing, dot-to-dot, shape-matching, mazes, etc. Although this may seem like a lot of effort (and plastic), I now have a learning resource that Mr Sociable can use over and over, then pass on to younger siblings/friends.


The great advantage of using the book this way is that Mr Sociable can now gain mastery over activities and actually enjoy them (whiteboard markers are always fun!). This morning I showed him how to do a maze. I rubbed it out and he did it again. I went outside to do the washing while he completed the maze again (at his request!).

Completing the maze independently
It always surprises me that kids are happy to keep doing the same activity - but I think they enjoy the feeling of success that comes with knowing what to do. I am hoping that as he learns to do more of these activities, that he will be able to sit and "work" at the table independently while I cook dinner etc.

Practising tracing 'A' - we did this activity together

Thursday, 18 August 2011

Teaching kids to spell and write their name

Mr Sociable knows how to say the letters in his name, but is still learning to find the written letters and put them in order. We are also practising writing the letters in his name. The other day, while practising his name in our 'learning time', he said to me, "This is really fun Mummy." This morning he said, "I can't wait until our learning time today." These comments make me happy :) Learning can be fun!

So, here are some tips and fun ideas for teaching your kids to spell and write their name:

* Check that you are writing the letters "correctly" (ie. the way they will be taught at school) before you teach them to your kids. So many of the kids in my class had to "unlearn" what they had been taught at home because their parents' writing style was different to what is taught in school. Here is an alphabet chart written in NSW Foundation Handwriting style.

* Teach kids to write their name as a combination of upper and lower case (eg. B-e-n, not B-E-N). This is how they will be expected to write their name at school - so it helps if they learn it this way at home too.

* Spell out their name with magnets or foam letters

 Foam letters

* Write their name in highlighter for them to trace in texta, crayon, pencil, or a different colour highlighter.

Highlighter

* Make a name card with typed, outlined letters (I use the NSW foundation font; if you don't have access to this, just use comic sans - so long as you are not married to a graphic designer ;) ). Laminate the paper & let give your child a "grown up" whiteboard marker to trace their name. If you don't have a laminator, you could tape the paper onto the outside of the glass, then use a whiteboard marker on the other side of the glass to trace the letters.

Tracing letters through a glass door

* Help your child to find the letters of their name in a magazine. Cut the letters out & arrange them in order.

* Write the letters of your child's name. Cut them out. Ask your child to arrange them in order.

 
Cut out letters

* Practise writing their name in different mediums (eg. with pencil on sandpaper, with a stick in sand, with a skewer in playdoh)

Writing in the sand
Related Posts Plugin for WordPress, Blogger...